Setup email account using Apple Mail OS Maverick and Yosemite
1. Click Mail on the menu bar
2. Select Add Account
3. Select the radio button next to 'Add Other Mail Account' and click continue.

4. Next you'll be asked to fill in your email credentials

Complete the following information:
- Full Name: The name displayed to the email recipient
- Email Address: The email account you wish to connect to
- Password: Email account password
- Note: The email address will not automatically configure itself.
5. Click Next
6. Next, you’ll be asked to enter your incoming mail server details
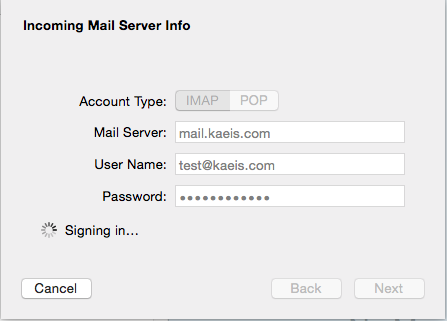
Complete the following information:
- Account Type: Select IMAP
- Mail server: mail.kaeis.com (replace kaeis.com with your own domain).
- User Name: The email address of the account you wish to connect to
- Password: The password used for this email account
7. Click Next
You may get another warning message about Apple Mail not being able to verify the identity of the server you are attempting to connect to. Simply click [Connect] to continue

8. You will now be asked to provide additional information about the incoming mail server:
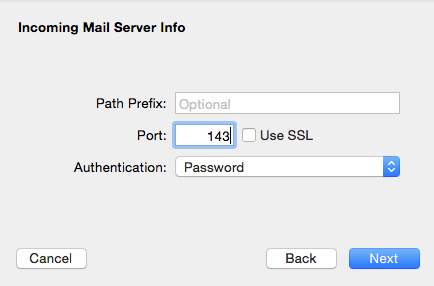
Complete the following information:
- Path Prefix: Option Field you may leave blank
- Port: Your incoming mail server port number, 143 for IMAP
- Uncheck use SSL
- Authentication: Password
9. Click Next, you will be then asked to enter in your outgoing mail server details
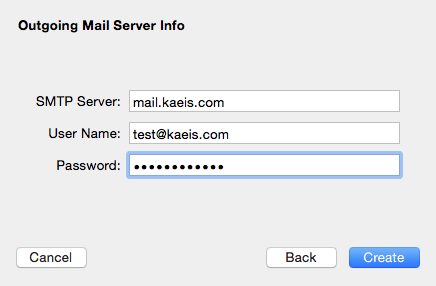
Complete the following information:
- SMTP server: mail.kaeis.com (replace kaeis.com with your own domain)
- User Name: The email address of the account you wish to connect to
- Password: The password used for this email account
10. Click Create.
11. You will now be asked to provide additional information about the incoming mail server.
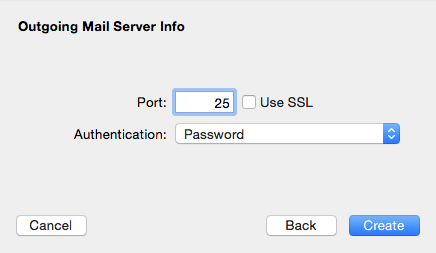
Complete the following information:
- Port: 25
- Uncheck Use SSL
- Authentication: Password
12. Click Create.
13. Close the Mail application and re-open it.
14. Click on Mail and then select Preferences
15. Select Accounts and then click on the account you want to edit, then click 'Advanced'
16. In the pop up window, uncheck 'Automatically detect and maintain account settings'
17. Click on Account Information
18. Click on the Outgoing Mail Server(SMTP) server list and select 'Edit SMTP Server List'
19.Click on the SMTP server you are using for this account
20. Click on 'Advanced' and uncheck 'Automatically detect and maintain account settings'
21. Click OK and close the accounts window
You are email is now setup, we recommending testing it by sending yourself an email.
